Why We Love QuickDBD Tool for Database Design

In Software development, the very first and important step is designed Database schemas. Its blueprints of your database and represents the database structure, variable type, validate, etc.

There are too many Database Diagram tools available. But in my experience, we use QuickDBD tools for Database Diagrams. It’s really easy to design database diagrams and really the right tools for that. your need just types syntax and database diagram will be drawn on the right side. Also, we can collaborate with a team.

5 Reasons to use QuickDBD Tools.

1. Work Fluently

Software development time is too important. QuickDBD provides features to draw schemas without leaving the keyboard. it also provides whatever detail is required to show. Developers can also write comments for feature remainder.

2. Save Time

We use QuickDBD Tools for long provide it really helps and saves a lot of time because of just writing syntax and remaining tasks done. GUI tools will never interrupt your working flow. It’s really simple and easy. All formats are easy to simple for developers.

3. Easy Syntex

As beginners, We think writing syntax for Database? I suggest it is just a simple syntax it saves you a lot of time. If you love to write code, you really love to write Database.

The basic system used like create a table just type table name and us -(dash) for starting field name and type. There are also special characters PK, int, Date, etc. We use the # (Hash) sign to write any comment.

4. Collaborate

As you are a single or multiple architect designer of a system. We can share diagrams online. QuickDBD will help to collaborate features to share the same file and quick update with collaboration.

In our experience, we are sharing databases with 4 to 5 teams, Architect designer to developer. Also, We have a link to the developer for understanding the meaning for field and data type.

Whether are you single and team this feature definitely helps to make your project successfully collaborate with a team.

5. Provide Export Feature

QuickDBD provides easy to export any file format like ANSI SQL, MySQL, SQL Server, and PostgreSQL file. This feature really saves your lot of time. Also, provide features for database document export for reference purposes in PDF file format to PNG and SVG File. It makes your diagram and document look good and helps to communicate clearly.

Whether you’re a beginner or an experienced professional QuickDBD database schema generator is an excellent choice. Also helps to model database and create code for MySQL, PostgreSQL and SQL Server much more.

Arkay Apps have used the QuickDBD tool for the last 1 year. After the experience, our team makes database design, Database documentation, and software development tasks too easy and saves a lot of time. It also provides a free trial period for demo purposes.

Read More
Harsh Gor Harsh Gor January 31, 2020 0 Comments

Setup WordPress on DigitalOcean Cloud Server

Digital Ocean is a fastest-growing developer-friendly cloud hosting solution companies focus on simplicity and scale. Today we are going to learn how to set up (Install) and configure WordPress on DigitalOcean Cloud Server Droplet.

Getting started, you need a domain name to use this One-Click, which you can purchase from any domain registrar You can purchase it from Google Domains, Godaddy, etc.  

If you do not have DigitalOcean account you can create one and get $100 Free credit.


Let’s start step by step WordPress setup.

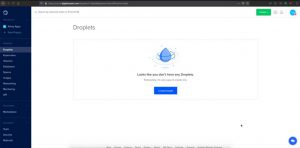
Step 1: Create a droplet

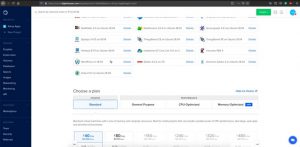
  • Choose an image, go to the marketplace and select WordPress on 18.04.

  • Complete the remaining droplet creation steps.

After that, you’ll need to log into the Droplet via SSH to finish the WordPress setup. This restricts the setup wizard from being visible to the internet until you’re ready to complete it. If you try to visit the Droplet’s IP address before logging into the Droplet, you’ll see a DigitalOcean landing page.


Step 2: Access Droplet via SSH

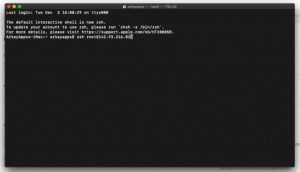
  • Start terminal on your local computer, connect to the Droplet as root. Make sure to substitute the Droplet’s IP address.
ssh root@use_your_droplet_ip

If you did not add an SSH key when you created the Droplet, you’ll first be prompted to reset your root password.

Then, the interactive script that runs will first prompt you for your domain or subdomain.


Step 3: Set domain

An A record from the domain (e.g., your-domain.com) to the server’s IP address.

An A record from the domain prefaced with www (e.g., www.your-domain.com) to the server’s IP address.

Next, the script will ask you to enter your domain.

Step 4: Setup WordPress administrative user

Next, the script will ask you to create the administrative user for your new WordPress blog. These are the credentials you will later use to log into your new site from your browser.

  • Enter the email for the admin user which is used for password recovery if needed.

  • Set a username and password.
  • Now enter the Blog Title – This can be changed later through the web interface.

Step 5: SSL(https) configuration

The next step asks if you want to use SSL for your website via Let’s Encrypt, which we recommend.

  • Next, you have the option of configuring LetsEncrypt to secure your new site. Before doing this, be sure that you have pointed your domain or subdomain to this server’s IP address. You can also run LetsEncrypt certbot later with the command ‘certbot –apache’.
Would you like to use LetsEncrypt (certbot) to configure SSL(https) for your new site? (y/n): y
  • Next, you have the option to choose https over http to redirect your traffic.

If you like to redirect all your traffic then select 2 otherwise select 1.

After you respond to these prompts, you’ll see a confirmation message.

WordPress has been enabled at http://your-domain.com Please open this URL in a browser to complete the setup of your site.

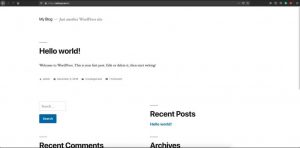
At this point, you should visit the Droplet’s IP address in your browser to see your new site and visit http: //[your_domain]/wp-admin to manage it.

Once the installation is complete, you can use the WordPress admin dashboard to customize the new site.

For reference:

  • The MySQL root password is in /root/.digitalocean_password.
  • The web root is /var/www/html, and the WordPress configuration file is /var/www/html/wp-config.php.


In addition, We recommend you take a few customized setup steps:

when hosting multiple sites creating an Apache virtual host file for each site maintains the default configuration as the fallback, as intended, and makes it easier to manage changes.

To do so, you’ll need to create two things for each domain: a new directory in /var/www for that domain’s content, and a new virtual host file in /etc/apache2/sites-available for that domain’s configuration.

If you didn’t enable HTTPS during the initial setup script, you can enable it manually at any time after the fact.

Setting up an SSL certificate set up HTTPS on the webserver, which secures the traffic between the server and the clients connecting to it. Certbot is a free and automated way to set up SSL certificates on a server. It’s a part of the WordPress One-Click to make securing the Droplet easier.

To use Certbot, you will need a registered domain and two DNS records:

  • An A record from the domain (e.g., your-domain.com) to the server’s IP address
  • An A record from the domain prefaced with www (e.g., www.your-domain.com) to the server’s IP address

Additionally, if you’re using a virtual hosts file, you’ll need to make sure the server name directive in the VirtualHost block (e.g., ServerName your-domain.com) is correctly set to the domain.

Once the DNS records and, optionally, the virtual hosts files are set up, you can generate the SSL certificate. Make sure to replace the domain in the command.

CMD – certbot –apache -d your-domain.com -d www.your-domain.com

HTTPS traffic on port 443 is already allowed through the firewall. After you set up HTTPS, you can optionally deny HTTP traffic on port 80:

CMD – ufw delete allow 80/tcp


Reference:

[1] https://marketplace.digitalocean.com/apps/wordpress

Read More
Harsh Gor Harsh Gor December 19, 2019 0 Comments

What is load balancer? How to setup load balancer in DigitalOcean

Load Balancing manages workload between two or more computers(machines). The advantage of load balancing is that allows for more efficient use of computing resources and prevents anyone machine from being overload. This is very important for high traffic website.

In short, Load balancers manage traffic to groups of Droplets, which decouples the overall health of a backend service from the health of a single server to make sure that your services stay online. [1]

There are two steps for creating load balancing.

  • 1. Creating a load balancer.
  • 2. choosing droplet for its backend.

1.  Create Load Balancers

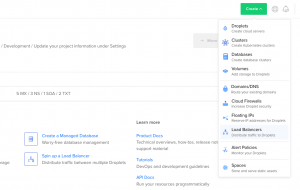
Step 1: Start by creating a load balancer using the Create button at the top of the control panel.

On the creation page, you will:

Step 2: Choose a datacenter region. Your load balancer and its backend Droplets need to be in the same datacenter, so choose the region where your Droplets are or will be located.

Step 3: Add forwarding rules. Forwarding rules define how traffic is routed from the load balancer to its backend Droplets. You need at least one rule.

The default route is HTTP port 80 on the load balancer to HTTP port 80 on the backend Droplets. If you want you can create new rules during creation with the New Rule drop-down. After creation, you can modify a load balancer’s rules at any time on its Settings page.

Step 4: Finalize and create, which includes Choose a name and Select project. Load balancer names must be unique and contain alphanumeric characters, dashes, and periods only. 

Video of Create LoadBalancer and setup up Droplet.


2. Select Droplets

After you create the load balancer, you’ll be brought to the load balancer’s detail page where you can add Droplets to it. Click Choose Droplets to open the Add Droplets window.

You can add individual Droplets or you can choose a tag. You can only choose Droplets that are in the same region as the load balancer.

When you’ve selected the tag or Droplets, click Add Droplets. The load balancer will check the health of the backend Droplets. Once the servers have passed the health check the required number of times, they will be marked healthy and the load balancer will begin forwarding requests to them.

Once you have at least one load balancer, you can view and manage them on the load balancer index page.


3. Load Balancing Algorithms

The load balancing algorithms provide different advantages; the choice of load balancing method depends on your needs:

Round Robin – Requests from clients are spread out across the group of servers sequentially.

Least Connections – A new request from the client is sent to the server with the fewest current connections to clients. [2]

Conclusion

So we can say that load balancer is a very useful utility for large scale projects for handling sudden hike of incoming requests. And digital ocean provide this useful utility in very few steps and in hassle less manner.

Arkay Apps  is DigitalOcean cloud partner we provide cloud server maintenance server let save your time we all manage on server maintenance. let’s arrange meeting with our expert.


Reference

  1. https://www.digitalocean.com/docs/networking/load-balancers/
  2. https://www.digitalocean.com/docs/networking/load-balancers/how-to/create/


Read More
Harsh Gor Harsh Gor November 30, 2019 0 Comments

Getting Started with Flutter

There have been various tools released for cross-platform development over the years, including web-based tools such as PhoneGap from Adobe, powerful frameworks such as Xamarin from Microsoft, and newer tools such as React Native from Facebook. Each toolset has pros and cons and they have met with varying degrees of success in the mobile industry.

Flutter from Google is a recent framework to enter the cross-platform arena, which was announced in February at Mobile World Congress 2018 to be entering a beta phase. Features of Flutter are fast development cycles, fast UI rendering and unique UI design, and native app performance on both platforms.


Introduction to Flutter

Dart programming language is used to write Flutter apps that are originally from Google and now an ECMA standard. Dart language is somewhat similar to languages like Kotlin and Swift and can be trans compiled into JavaScript code.


Getting Started

Flutter application development can be done on Windows, Linux, or macOS. While you can use any editor with the Flutter toolchain, there are IDE plugins for IntelliJ IDEA, Android Studio and Visual Studio Code that can ease the development cycle. We’ll use Android Studio for this tutorial.


Set up an editor

install the Flutter and Dart plugins

To install these:

  • Start Android Studio.
  • Open plugin preferences (File > Settings > Plugins on Windows & Linux, Preferences > Plugins on macOS,).
  • Select Browse repositories, select Flutter plugin and click Install.
  • Click Yes to install the Dart plugin.
  • Click Restart when prompted.

Create the app

  • Select the File > New Flutter Project.
  • Select project type – Flutter application, and press Next.
  • Make sure Flutter SDK Path text field specifies the location of the SDK. Install the SDK if it is not installed.
  • Enter a project name (for example, myapp), and press Next.
  • Click Finish.
  • Wait until Android Studio installs the SDK, and create the project.

1. main.dart

import 'package:flutter/material.dart';

void main() => runApp(new FlutterApp());


class FlutterApp extends StatelessWidget {
  @override
  Widget build(BuildContext context) {
	return new MaterialApp(
  	title: 'Flutter',
  	home: new Scaffold(
    	appBar: new AppBar(
      	title: new Text('Flutter'),
    	),
    	body: new Center(
      	child: new Text('Flutter'),
    	),
  	),
	);
  }
}

The main() function near the top uses the => operator for a single line function to run the app. You have a class for the app named GHFlutterApp.

You see here that your app itself is a StatelessWidget. almost every entities in a Flutter app are widgets, either stateless or stateful.  Override the widget build() method to create your app widget. You’re using the MaterialApp widget that provides a number of components needed for apps following Material Design.

For this getting started tutorial, remove the test file widget_test.dart in the test folder from the project by selecting it and hitting the Delete key.

If you’re on macOS, startup the iOS simulator. You can also use an Android emulator on macOS, Linux, or Windows.


2. Hot Reload

The best aspect of Flutter development is being able to hot reload your app as you make changes. This is like Android Studio’s Instant Run.


3. Widgets

Almost every element of your Flutter app is a widget. Widgets are immutable, since using immutable widgets helps keep the app UI lightweight.

There are two fundamental types of widgets you will use:

Stateless widgets are immutable, meaning that their properties can’t change—all values are final. [1]

Stateful widgets maintain state that might change during the lifetime of the widget. [1]

Stateless and stateful widgets are redrawn in Flutter apps on every frame, the difference being that the stateful widgets delegate their configuration to a State object.

To get started with making your own widgets create a new class at the bottom of main.dart:

class GHFlutter extends StatefulWidget {
  @override
  createState() => new GHFlutterState();
}

You have made a StatefulWidget subclass and you’re overriding the createState() method to create its state object. Now add a GHFlutterState class above GHFlutter:

class GHFlutterState extends State<GHFlutter> {
}

Add a build() override to GHFlutterState:

@override
Widget build(BuildContext context) {
   
}

Fill out build() as follows:

@override
Widget build(BuildContext context) {
  return new Scaffold (
	appBar: new AppBar(
  	title: new Text(Strings.appTitle),
	),
	body: new Text(Strings.appTitle),
  );
}

A Scaffold is a container for material design widgets. It acts as the root of a widget hierarchy. You’ve added an AppBar and a body to the scaffold, and each contains a Text widget.


Update GHFlutterApp class so that it uses your new GHFlutter widget as its home attribute, instead of building a scaffold of its own:

class GHFlutterApp extends StatelessWidget {
  @override
  Widget build(BuildContext context) {
	return new MaterialApp(
  	title: Strings.appTitle,
  	home: new GHFlutter(),
	);
  }
}

4. Making Network Calls

Earlier you imported your own strings.dart file into the project. You can similarly import other packages that are part of the Flutter framework and Dart.

For example, you’ll now use packages available in the framework to make an HTTP network call and also parse the resulting response JSON into Dart objects. Add two new imports at the top of main.dart:

import 'dart:convert';

import 'package:flutter/material.dart';
import 'package:http/http.dart' as http;

import 'strings.dart';

Dart apps are single-threaded, but Dart provides support for running code on other threads as well as running asynchronous code that does not block the UI thread using an async/await pattern.

You’re going to make an asynchronous network call to retrieve a list of GitHub team members. Add an empty list as a property at the top of GHFlutterState, and also add a property to hold a text style:

var _members = [];

final _biggerFont = const TextStyle(fontSize: 18.0);

The underscores at the beginning of the names make the members of the class private.

To make the asynchronous HTTP call, add a method _loadData() to GHFlutterState:

_loadData() async {
  String dataURL = "https://api.github.com/orgs/raywenderlich/members";
  http.Response response = await http.get(dataURL);
  setState(() {
	_members = JSON.decode(response.body);
  });
}

The underscores at the beginning of the names make the members of the class private.

To make the asynchronous HTTP call, add a method _loadData() to GHFlutterState:

_loadData() async {
  String dataURL = "https://api.github.com/orgs/raywenderlich/members";
  http.Response response = await http.get(dataURL);
  setState(() {
	_members = json.decode(response.body);
  });
}

You’ve added the async keyword onto _loadData() to tell Dart that it’s asynchronous, and also the await keyword on the http.get() call that is blocking. You’re using a dataUrl value that is set to the GitHub API endpoint that retrieves members for a GitHub organization.

When the HTTP call completes, you pass a callback to setState() that runs synchronously on the UI thread. In this case, you are decoding the JSON response and assigning it to the _members list.

Add an initState() override to GHFlutterState that calls _loadData() when the state is initialized:

@override
void initState() {
  super.initState();

  _loadData();
}

5. Using a ListView

Now that you have a Dart list of members, you need a way to display them in a list in the UI. Dart provides a ListView widget that will let you show the data in a list. ListView acts like a RecyclerView on Android and a UITableView on iOS, recycling views as the user scrolls through the list to achieve smooth scrolling performance.

Add a _buildRow() method to GHFlutterState:

Widget _buildRow(int i) {
  return new ListTile(
	title: new Text("${_members[i]["login"]}", style: _biggerFont)
  );
}

You are returning a ListTile widget that shows the “login” value parsed from the JSON for the ith member, and also using the text style you created before.

Update the build method to have it’s body be a ListView.builder:

body: new ListView.builder(
  padding: const EdgeInsets.all(16.0),
  itemCount: _members.length,
  itemBuilder: (BuildContext context, int position) {
	return _buildRow(position);
  }),

That’s just how easy it is to make a network call, parse the data, and show the results in a list!

6. Adding dividers

To add dividers into the list, you’re going to double the item count, and then return a Divider widget when the position in the list is odd:

body: new ListView.builder(
  itemCount: _members.length * 2,
  itemBuilder: (BuildContext context, int position) {
	if (position.isOdd) return new Divider();

	final index = position ~/ 2;

	return _buildRow(index);
  }),

Be sure not to miss the * 2 on itemCount. You’ve removed padding from the builder now that you have dividers. In itemBuilder, you’re either returning a Divider(), or instead calculating a new index by integer division and using _buildRow() to build a row item.

Read More
Harsh Gor Harsh Gor October 25, 2019 0 Comments