Setup WordPress on DigitalOcean Cloud Server
Digital Ocean is a fastest-growing developer-friendly cloud hosting solution companies focus on simplicity and scale. Today we are going to learn how to set up (Install) and configure WordPress on DigitalOcean Cloud Server Droplet.
Getting started, you need a domain name to use this One-Click, which you can purchase from any domain registrar You can purchase it from Google Domains, Godaddy, etc.
If you do not have DigitalOcean account you can create one and get $100 Free credit.
Let’s start step by step WordPress setup.
Step 1: Create a droplet
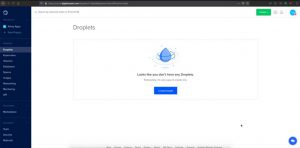
- Choose an image, go to the marketplace and select WordPress on 18.04.
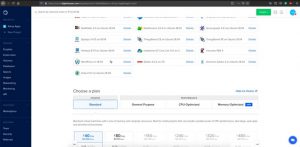
- Complete the remaining droplet creation steps.
After that, you’ll need to log into the Droplet via SSH to finish the WordPress setup. This restricts the setup wizard from being visible to the internet until you’re ready to complete it. If you try to visit the Droplet’s IP address before logging into the Droplet, you’ll see a DigitalOcean landing page.
Step 2: Access Droplet via SSH
- Start terminal on your local computer, connect to the Droplet as root. Make sure to substitute the Droplet’s IP address.
ssh root@use_your_droplet_ip
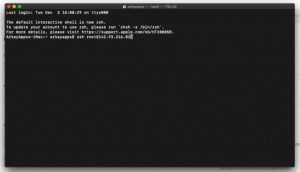
If you did not add an SSH key when you created the Droplet, you’ll first be prompted to reset your root password.
Then, the interactive script that runs will first prompt you for your domain or subdomain.
Step 3: Set domain
An A record from the domain (e.g., your-domain.com) to the server’s IP address.
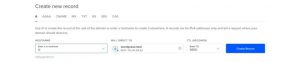
An A record from the domain prefaced with www (e.g., www.your-domain.com) to the server’s IP address.
Next, the script will ask you to enter your domain.

Step 4: Setup WordPress administrative user
Next, the script will ask you to create the administrative user for your new WordPress blog. These are the credentials you will later use to log into your new site from your browser.
- Enter the email for the admin user which is used for password recovery if needed.
![]()
- Set a username and password.
- Now enter the Blog Title – This can be changed later through the web interface.
Step 5: SSL(https) configuration
The next step asks if you want to use SSL for your website via Let’s Encrypt, which we recommend.
- Next, you have the option of configuring LetsEncrypt to secure your new site. Before doing this, be sure that you have pointed your domain or subdomain to this server’s IP address. You can also run LetsEncrypt certbot later with the command ‘certbot –apache’.
Would you like to use LetsEncrypt (certbot) to configure SSL(https) for your new site? (y/n): y
- Next, you have the option to choose https over http to redirect your traffic.
If you like to redirect all your traffic then select 2 otherwise select 1.

After you respond to these prompts, you’ll see a confirmation message.
WordPress has been enabled at http://your-domain.com Please open this URL in a browser to complete the setup of your site.

At this point, you should visit the Droplet’s IP address in your browser to see your new site and visit http: //[your_domain]/wp-admin to manage it.

Once the installation is complete, you can use the WordPress admin dashboard to customize the new site.
For reference:
- The MySQL root password is in /root/.digitalocean_password.
- The web root is /var/www/html, and the WordPress configuration file is /var/www/html/wp-config.php.
In addition, We recommend you take a few customized setup steps:
when hosting multiple sites creating an Apache virtual host file for each site maintains the default configuration as the fallback, as intended, and makes it easier to manage changes.
To do so, you’ll need to create two things for each domain: a new directory in /var/www for that domain’s content, and a new virtual host file in /etc/apache2/sites-available for that domain’s configuration.
If you didn’t enable HTTPS during the initial setup script, you can enable it manually at any time after the fact.
Setting up an SSL certificate set up HTTPS on the webserver, which secures the traffic between the server and the clients connecting to it. Certbot is a free and automated way to set up SSL certificates on a server. It’s a part of the WordPress One-Click to make securing the Droplet easier.
To use Certbot, you will need a registered domain and two DNS records:
- An A record from the domain (e.g., your-domain.com) to the server’s IP address
- An A record from the domain prefaced with www (e.g., www.your-domain.com) to the server’s IP address
Additionally, if you’re using a virtual hosts file, you’ll need to make sure the server name directive in the VirtualHost block (e.g., ServerName your-domain.com) is correctly set to the domain.
Once the DNS records and, optionally, the virtual hosts files are set up, you can generate the SSL certificate. Make sure to replace the domain in the command.
CMD – certbot –apache -d your-domain.com -d www.your-domain.com
HTTPS traffic on port 443 is already allowed through the firewall. After you set up HTTPS, you can optionally deny HTTP traffic on port 80:
CMD – ufw delete allow 80/tcp
Reference:
[1] https://marketplace.digitalocean.com/apps/wordpress