User Authentication with Python Flask and MySQL

In the following blog, I am going to demonstrate a Login system using Python Flask and MySQL. I’m also covering the basics of Flask and common practices.


Table of content

Introduction to Flask

If you are thinking of developing a web application in Python, then the first thing that comes into your mind is a framework, and if it is so, then the Flask is the answer to your question.

Flask is light-weight Python framework developed by “Armin Ronacher”. werkzeug WSGI toolkit and jinja2 template engines are the main pillars of the flask framework.


Understanding user authentication and why it is important?

We all undergo the process of authentication initially, whenever we try to navigate to any website or using any mobile Apps, Web applications.

Logins are the set of credentials, which provide the security to prevent unauthorized access to data, and also verify the user’s identity.


Let’s start

Let’s start by installing the necessary packages.

sudo apt install python3-virtualenv

Python3 comes with a venv module to create virtual environments, which are independent groups of Python libraries, one for each project. Packages installed for one project will not influence other projects.

pip3 install flask

The above command will install the Flask module in your project.

pip3 install flask-mysqldb

flask-mysqldb helps you to connect and interact with the MySQL database.

pip install flask-bcrypt

This module is used for password hashing.


Creating the main application file

create an app.py file in your project folder and write the following code.

from flask import Flask, render_template
app = Flask(__name__)

if __name__ == '__main__':
  app.run(host='127.0.0.1', port=8000, debug=True)

This code will host our application on 127.0.0.1 which is localhost with port number 8000. By default, the port number is 5000.

If you change to debug mode as True, the server will reload itself on code changes, you no need to restart the server after every change into the code.


Adding Routes

from flask import Flask, render_template
app = Flask(__name__)

@app.route('/')
def root():
  return render_template('login.html')

@app.route('/home')
def home():
  return render_template('home.html')

if __name__ == '__main__':
  app.run(host='127.0.0.1', port=8000, debug=True)

here, the (‘/’) route is bound with the login method, so whenever we navigate to that route the login method will render automatically. Same, with the home route.


Creating templates

create templates folder in your project and add all Html files to that folder because Flask will try to find your Html file in this folder.

  • Project Folder
    • app.py
    • templates
      • login.html
      • home.html

Login.html

<html>
<head>
    {% with messages = get_flashed_messages() %}  
    {% if messages %}  
          {% for message in messages %}  
               <p style="text-align: center; color: #9C27B0;">{{ message }}</p>  
          {% endfor %}  
    {% endif %}  
    {% endwith %}
</head>
<body>
    <div class="main">
        <p class="sign" align="center">Login</p>
        <form class="form1" action="{{url_for('authenticate')}}" method="POST">
            <input class="un " type="text" align="center" placeholder="Username" name="username" required>
            <input class="pass" type="password" align="center" placeholder="Password" name="password" required>
            <button class="submit" type="submit">Login</button>
        </form>
    </div>   
</body>
</html>


Home.html

<!DOCTYPE html>
<html lang="en">
<head>
   <title>Home</title>
</head>
<body>
   <form action="{{url_for('logout')}}" >
       <div class="main">
           <h2 style="text-align: center; margin-top: 25px; color: rgb(85, 12, 124); padding-top: 25px;">Welcome {{uname}}</h2>
           <button class="submit" type="submit" style="margin-top: 25px;">Logout</button>
       </div>
   </form>
</body>
</html>

Full source code for Login.html and Home.html is available on GitHub


Connection to the MySQL database

Add this code to app.py file

from flask_mysqldb import MySQL

app = Flask(__name__)

app.config['MYSQL_HOST'] ='localhost'
app.config['MYSQL_USER'] = 'root'
app.config['MYSQL_PASSWORD'] = 'your password'
app.config['MYSQL_DB'] = 'name of your database'

mysql = MySQL(app)


Adding Authenticate Method

from flask_bcrypt import Bcrypt

import os

bcrypt = Bcrypt()

@app.route('/authentication',methods=['POST','GET'])

def authenticate():

   if request.method == 'POST':
       uname = request.form['username']
       passwrd = request.form['password']   

       cur = mysql.connection.cursor()
       cur.execute("SELECT username,password FROM user WHERE username=%s",[uname])
       user = cur.fetchone()
       temp = user[1]

       if len(user) > 0:
           session.pop('username',None)
           if (bcrypt.check_password_hash(temp,passwrd)) == True:  
               session['username'] = request.form['username']
               return render_template('home.html',uname=uname)
           else:
               flash('Invalid Username or Password !!')
               return render_template('login.html')
   else:
       return render_template('login.html')

if __name__ == '__main__':
    app.secret_key = os.urandom(24)
    app.run(host='127.0.0.1', port=8000, debug=True)

The check_password_hash of bcrypt will check the existing password hash against the currently generated password hash , In our case if temp and passwrd will match then it returns True . otherwise returns False.

session.pop() method is used to release a session variable . in our case “username is our session variable . so we will set it to None.

The Session data is stored on top of cookies and the server signs them cryptographically. For this encryption, a Flask application needs a defined SECRET_KEY.  app.secret_key = os.urandom(24) will return a 24 character long string of random numbers.


Adding Logout Method

@app.route('/logout')
def logout():
    session.clear()
    return render_template('login.html')


In this step, we will restrict a user to access URL to any other pages without login.

For e.g. If any user tries to access localhost:8000/home without login, we can put any error message and the user will remain to the login page.

from flask import Flask , render_template,request,url_for,redirect,session,flash,g

@app.before_request

def before_request():

g.username = None


if 'username' in session:

g.username = session['username']

@app.route('/home')

def home():
   if g.username:
       return render_template('home.html')
   else:
       return render_template('login.html')

Here we will check whether “username”  variable is set or not , if the variable is set to session then the user can move to the home page . otherwise user will remain navigate to login page

Here is the final code for app.py file

from flask import Flask,render_template,request,url_for,redirect,session,flash,g
from flask_mysqldb import MySQL
from flask_bcrypt import Bcrypt
import os

app = Flask(__name__)

app.config['MYSQL_HOST'] ='localhost'
app.config['MYSQL_USER'] = 'root'
app.config['MYSQL_PASSWORD'] = 'password'
app.config['MYSQL_DB'] = 'user'

mysql = MySQL(app)
bcrypt = Bcrypt()

@app.before_request
def before_request():
   g.username = None
   if 'username' in session:
       g.username = session['username']

@app.route('/')
def root():
   return render_template('login.html')

@app.route('/authentication',methods=['POST','GET'])
def authenticate():
   if request.method == 'POST':
       uname = request.form['username']
       passwrd = request.form['password']   
       cur = mysql.connection.cursor()
       cur.execute("SELECT username,password FROM user WHERE username=%s",[uname])
       user = cur.fetchone()
       temp = user[1]
       if len(user) > 0:
           session.pop('username',None)
           if (bcrypt.check_password_hash(temp,passwrd)) == True:  
               session['username'] = request.form['username']
               return render_template('home.html',uname=uname)
           else:
               flash('Invalid Username or Password !!')
               return render_template('login.html')
   else:
       return render_template('login.html')

@app.route('/home')
def home():
   if g.username:
       return render_template('home.html')
   else:
       return render_template('login.html')

@app.route('/logout')
def logout():
   session.clear()
   return render_template('login.html')

if __name__ == '__main__':
    app.secret_key = os.urandom(24)
    app.run(host='127.0.0.1', port=8000, debug=True)


Output


Full source code is available on GitHub


Conclusion

By following this article one can have basic knowledge of flask and also be able to accomplish basic tasks such as authentication for a web app.

I will try to cover more such topics in upcoming blogs
References

https://speckyboy.com/login-pages-html5-css/

https://www.maartenbaert.be/simplescreenrecorder/

Read More
Zeel Pandya Zeel Pandya June 16, 2020 0 Comments

Why We Love QuickDBD Tool for Database Design

In Software development, the very first and important step is designed Database schemas. Its blueprints of your database and represents the database structure, variable type, validate, etc.

There are too many Database Diagram tools available. But in my experience, we use QuickDBD tools for Database Diagrams. It’s really easy to design database diagrams and really the right tools for that. your need just types syntax and database diagram will be drawn on the right side. Also, we can collaborate with a team.

5 Reasons to use QuickDBD Tools.

1. Work Fluently

Software development time is too important. QuickDBD provides features to draw schemas without leaving the keyboard. it also provides whatever detail is required to show. Developers can also write comments for feature remainder.

2. Save Time

We use QuickDBD Tools for long provide it really helps and saves a lot of time because of just writing syntax and remaining tasks done. GUI tools will never interrupt your working flow. It’s really simple and easy. All formats are easy to simple for developers.

3. Easy Syntex

As beginners, We think writing syntax for Database? I suggest it is just a simple syntax it saves you a lot of time. If you love to write code, you really love to write Database.

The basic system used like create a table just type table name and us -(dash) for starting field name and type. There are also special characters PK, int, Date, etc. We use the # (Hash) sign to write any comment.

4. Collaborate

As you are a single or multiple architect designer of a system. We can share diagrams online. QuickDBD will help to collaborate features to share the same file and quick update with collaboration.

In our experience, we are sharing databases with 4 to 5 teams, Architect designer to developer. Also, We have a link to the developer for understanding the meaning for field and data type.

Whether are you single and team this feature definitely helps to make your project successfully collaborate with a team.

5. Provide Export Feature

QuickDBD provides easy to export any file format like ANSI SQL, MySQL, SQL Server, and PostgreSQL file. This feature really saves your lot of time. Also, provide features for database document export for reference purposes in PDF file format to PNG and SVG File. It makes your diagram and document look good and helps to communicate clearly.

Whether you’re a beginner or an experienced professional QuickDBD database schema generator is an excellent choice. Also helps to model database and create code for MySQL, PostgreSQL and SQL Server much more.

Arkay Apps have used the QuickDBD tool for the last 1 year. After the experience, our team makes database design, Database documentation, and software development tasks too easy and saves a lot of time. It also provides a free trial period for demo purposes.

Read More
Harsh Gor Harsh Gor January 31, 2020 0 Comments

Reason to choose Digital Ocean cloud server for your business.

DigitalOcean Cloud server popular in a startup as well as a business because it provides multiple compute options to your business with flexibility. There are four types of Virtual Machine (in Digital Ocean its call Droplet.) are available base on your requirement.


1.  Standard:

Virtual Machines with a mix of memory and compute resources. This Droplet is best for small projects that can handle variable levels of CPU performance, like web site, blog, WordPress site, testing project, etc.

2. General Purpose:

This is high-performance virtual machine with a dedicate hyper-thread intel processor and a good balance of memory. This is great choice of a wide range of projects like production workloads like web app hosting, medium-sized database, ERP, e-commerce website, etc.

2. CUP-Optimized:

Compute-optimized Droplet with dedicate hyper-thread from best in class intel processor. Best for CPU-intensive apps like machine learning, ad serving, video encoding, application service, etc.

2. Memory-Optimized:

This server with high RAM with dedicate hyper-thread best in class intel processor. This Droplet is the best suite for high-performance databases, web-scale in-memory caches and real-time big data processing.

Combined with industry- leading price to performance that removes the complextiy from your monthly bill

No Matter what kind of website, application or project that you plan to run on DigitalOcean, DO have the right virtual-machine to power your business. With hourly pricing and flat pricing across all data centers, you can ensure you are paying for the right amount of infrastructure.

Following Digital Ocean products, support is available to run your business smooth.

  • Managed Kubernetes
  • Managed Databases
  • Space Object for Storage
  • Team Management
  • Global Availability

Thousands of companies trust Digital Ocean to run their businesses. Arkay Apps,  Digital Ocean  Solution Partner in India provides Digital Ocean managed, consultants, Maintenace service to India.  let’s connect us for a half-hour free consultant with our expert.  for more detail at sales@arkayapps.com OR skype: arkayapps

Read More
Arkay Apps Arkay Apps December 27, 2019 0 Comments

Setup WordPress on DigitalOcean Cloud Server

Digital Ocean is a fastest-growing developer-friendly cloud hosting solution companies focus on simplicity and scale. Today we are going to learn how to set up (Install) and configure WordPress on DigitalOcean Cloud Server Droplet.

Getting started, you need a domain name to use this One-Click, which you can purchase from any domain registrar You can purchase it from Google Domains, Godaddy, etc.  

If you do not have DigitalOcean account you can create one and get $100 Free credit.


Let’s start step by step WordPress setup.

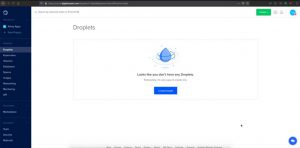
Step 1: Create a droplet

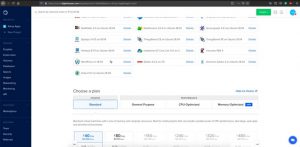
  • Choose an image, go to the marketplace and select WordPress on 18.04.

  • Complete the remaining droplet creation steps.

After that, you’ll need to log into the Droplet via SSH to finish the WordPress setup. This restricts the setup wizard from being visible to the internet until you’re ready to complete it. If you try to visit the Droplet’s IP address before logging into the Droplet, you’ll see a DigitalOcean landing page.


Step 2: Access Droplet via SSH

  • Start terminal on your local computer, connect to the Droplet as root. Make sure to substitute the Droplet’s IP address.
ssh root@use_your_droplet_ip

If you did not add an SSH key when you created the Droplet, you’ll first be prompted to reset your root password.

Then, the interactive script that runs will first prompt you for your domain or subdomain.


Step 3: Set domain

An A record from the domain (e.g., your-domain.com) to the server’s IP address.

An A record from the domain prefaced with www (e.g., www.your-domain.com) to the server’s IP address.

Next, the script will ask you to enter your domain.

Step 4: Setup WordPress administrative user

Next, the script will ask you to create the administrative user for your new WordPress blog. These are the credentials you will later use to log into your new site from your browser.

  • Enter the email for the admin user which is used for password recovery if needed.

  • Set a username and password.
  • Now enter the Blog Title – This can be changed later through the web interface.

Step 5: SSL(https) configuration

The next step asks if you want to use SSL for your website via Let’s Encrypt, which we recommend.

  • Next, you have the option of configuring LetsEncrypt to secure your new site. Before doing this, be sure that you have pointed your domain or subdomain to this server’s IP address. You can also run LetsEncrypt certbot later with the command ‘certbot –apache’.
Would you like to use LetsEncrypt (certbot) to configure SSL(https) for your new site? (y/n): y
  • Next, you have the option to choose https over http to redirect your traffic.

If you like to redirect all your traffic then select 2 otherwise select 1.

After you respond to these prompts, you’ll see a confirmation message.

WordPress has been enabled at http://your-domain.com Please open this URL in a browser to complete the setup of your site.

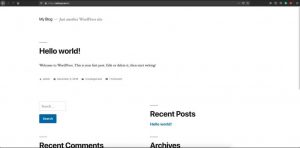
At this point, you should visit the Droplet’s IP address in your browser to see your new site and visit http: //[your_domain]/wp-admin to manage it.

Once the installation is complete, you can use the WordPress admin dashboard to customize the new site.

For reference:

  • The MySQL root password is in /root/.digitalocean_password.
  • The web root is /var/www/html, and the WordPress configuration file is /var/www/html/wp-config.php.


In addition, We recommend you take a few customized setup steps:

when hosting multiple sites creating an Apache virtual host file for each site maintains the default configuration as the fallback, as intended, and makes it easier to manage changes.

To do so, you’ll need to create two things for each domain: a new directory in /var/www for that domain’s content, and a new virtual host file in /etc/apache2/sites-available for that domain’s configuration.

If you didn’t enable HTTPS during the initial setup script, you can enable it manually at any time after the fact.

Setting up an SSL certificate set up HTTPS on the webserver, which secures the traffic between the server and the clients connecting to it. Certbot is a free and automated way to set up SSL certificates on a server. It’s a part of the WordPress One-Click to make securing the Droplet easier.

To use Certbot, you will need a registered domain and two DNS records:

  • An A record from the domain (e.g., your-domain.com) to the server’s IP address
  • An A record from the domain prefaced with www (e.g., www.your-domain.com) to the server’s IP address

Additionally, if you’re using a virtual hosts file, you’ll need to make sure the server name directive in the VirtualHost block (e.g., ServerName your-domain.com) is correctly set to the domain.

Once the DNS records and, optionally, the virtual hosts files are set up, you can generate the SSL certificate. Make sure to replace the domain in the command.

CMD – certbot –apache -d your-domain.com -d www.your-domain.com

HTTPS traffic on port 443 is already allowed through the firewall. After you set up HTTPS, you can optionally deny HTTP traffic on port 80:

CMD – ufw delete allow 80/tcp


Reference:

[1] https://marketplace.digitalocean.com/apps/wordpress

Read More
Harsh Gor Harsh Gor December 19, 2019 0 Comments

What is load balancer? How to setup load balancer in DigitalOcean

Load Balancing manages workload between two or more computers(machines). The advantage of load balancing is that allows for more efficient use of computing resources and prevents anyone machine from being overload. This is very important for high traffic website.

In short, Load balancers manage traffic to groups of Droplets, which decouples the overall health of a backend service from the health of a single server to make sure that your services stay online. [1]

There are two steps for creating load balancing.

  • 1. Creating a load balancer.
  • 2. choosing droplet for its backend.

1.  Create Load Balancers

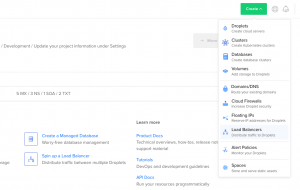
Step 1: Start by creating a load balancer using the Create button at the top of the control panel.

On the creation page, you will:

Step 2: Choose a datacenter region. Your load balancer and its backend Droplets need to be in the same datacenter, so choose the region where your Droplets are or will be located.

Step 3: Add forwarding rules. Forwarding rules define how traffic is routed from the load balancer to its backend Droplets. You need at least one rule.

The default route is HTTP port 80 on the load balancer to HTTP port 80 on the backend Droplets. If you want you can create new rules during creation with the New Rule drop-down. After creation, you can modify a load balancer’s rules at any time on its Settings page.

Step 4: Finalize and create, which includes Choose a name and Select project. Load balancer names must be unique and contain alphanumeric characters, dashes, and periods only. 

Video of Create LoadBalancer and setup up Droplet.


2. Select Droplets

After you create the load balancer, you’ll be brought to the load balancer’s detail page where you can add Droplets to it. Click Choose Droplets to open the Add Droplets window.

You can add individual Droplets or you can choose a tag. You can only choose Droplets that are in the same region as the load balancer.

When you’ve selected the tag or Droplets, click Add Droplets. The load balancer will check the health of the backend Droplets. Once the servers have passed the health check the required number of times, they will be marked healthy and the load balancer will begin forwarding requests to them.

Once you have at least one load balancer, you can view and manage them on the load balancer index page.


3. Load Balancing Algorithms

The load balancing algorithms provide different advantages; the choice of load balancing method depends on your needs:

Round Robin – Requests from clients are spread out across the group of servers sequentially.

Least Connections – A new request from the client is sent to the server with the fewest current connections to clients. [2]

Conclusion

So we can say that load balancer is a very useful utility for large scale projects for handling sudden hike of incoming requests. And digital ocean provide this useful utility in very few steps and in hassle less manner.

Arkay Apps  is DigitalOcean cloud partner we provide cloud server maintenance server let save your time we all manage on server maintenance. let’s arrange meeting with our expert.


Reference

  1. https://www.digitalocean.com/docs/networking/load-balancers/
  2. https://www.digitalocean.com/docs/networking/load-balancers/how-to/create/


Read More
Harsh Gor Harsh Gor November 30, 2019 0 Comments

Why should Choose WordPress for business Website

Over  19,500,000 websites on the entire web use WordPress technology for his website. This means approx 35% of this entire internet use WordPress. (Source) There are 50,000+ WordPress plugins are listed on official directory, and new ones being continues added daily.

This figure is enough to understand the power of WordPress on Internet.  If we create corporate website or personal blog there no any special change on wordpress. You believed that, WordPress is only for blogger but same technology is for corporate websites.   


Let’s understand how to wordpress helps our business.

1. Thousands of professionally designed Theme

ThemeForest, Market of HTML, WordPress Theme, There are more than 11,000 WordPress themes are available. That means, too many options available for select website Design and Look & Feel. There are also categorised on theme based on business like Healthcare, Real Estate, business related theme. We can choose the best suite to us and wordpress developer can customise it based on our requirement.


 2. Dynamic Website

Static website means, All content are hardcode on HTML page. if you change any thing on website, you have to contact the Web Developer/Designer or we should knowledge of HTML language. Where in dynamic website provide admin panel us for any changes on the website. Like change  on Contact detail, About us, Product etc we can do from that admin panel. Not need technical knowledge for change in website.


3. WordsPress Plugin

There are 50,000+ WordPress plugins are listed on official directory. This is a large amount of plugins free/paid available so it saves our lot of time/cost. Like one plugin of Security, SEO Plugin, WooCommerce plugin etc.


35% of this entire internet use WordPress.

4. Shopping Cart for Small Business

Small business have number of products and everone looking for present that product on a website.  if you are looking for create your online shopping cart for your business that WooCommerce WordPress plugin will help to design shopping cart website with order, shipping management with payment gateway. 


5. WordPress is OpenSource

In our business we have to check licence need to purchase before technology used. Here WordPress is open source technology so there are no any licence need to purchase to use on our corporate website. 

Also Server, Database, Operating system (LAMP) are used to host wordpress website are also open source. Like Linux and operating system, Apache as server and MySql as Database and PHP as Programming Language. All stack is open source there is no need to buy a single licence to host wordpress website.

6. No need HTML knowledge for update Website

There are a lot of plugin is available for making drag and drop to design html page. No need to write a single line of code to design page Ex. Page Builder by SiteOrigin helps you. Main problem of static website is that we have to contact Designer/Developer for single change on website but here designer and developer setup wordpress then remaining task we can do.


7. Scalable

511,000+ active members in WordPress meetup groups all over the world and 66 countries and 535 cities is where you can find WordPress meetup groups. This is the largest number of developer is ready to provide support. Website developed on wordpress there are no limits to page, blog post, category, etc. We can also use WooCommerce Plugin for developer our business shopping cart.


8. Hosting & Server Option = Freedom

WordPress provide Freedom of hosting. We can select any operating system hosting like Windows server, Linux or any other linux version of WordPress will work fine. Also LAMP stack is cheapest and open source technology stack, because of this wordpress hosting is the cheapest.   

9. Security

WordPress is the most hacked into CMS of them all. Out of the 8,000 infected websites analyzed in a study, 74% were built on WordPress. Also in 2017, 4000 WordPress websites got infected with malware coming from a fake SEO plugin. Source This figure shows that website build on WordPress is more chance to hack. One question is raised here they why should we choose WordPress?. As Arkay App also provide WordPress development services. We strick follow standard security step for secure our client website. Because of this there too less chance to hacked of effect by malware.  


10. SEO Friendly

We design website because of getting more chances to get business also visibility on Internet. Without SEO website design is worthless. On menaul system of seo is too costly too costly for small business. 

WordPress take care of 80-90% of google crawling issue. Also One SEO Pack moe most popular plugin in WordPress, Also helps to make our website seo friendly. There are also too many seo plugin available that save time and money on SEO. 

We can also write meta-tag, title, description on page for that no need to go on the code side. We can also write image alt tag when image upload time that also save crawling by google.


As we know WordPress to many developers, theme, plugin available on the internet. There are too many spam plugin also available which one target website and  infected with malware on it. Before think on decide wordpress development consultant guide, Who know well about wordpress security. Arkay App  web and mobile app development company helps on WordPress website development and implement security step on WordPress website.

Conclusion

These are a basic point to keep in mind while developing a website. While designing a website, the first and foremost thing to keep in mind is that the website should be pleasing to the readers and able to capture their attention.


Read More
Arkay Apps Arkay Apps November 27, 2019 0 Comments

Getting Started with Flutter

There have been various tools released for cross-platform development over the years, including web-based tools such as PhoneGap from Adobe, powerful frameworks such as Xamarin from Microsoft, and newer tools such as React Native from Facebook. Each toolset has pros and cons and they have met with varying degrees of success in the mobile industry.

Flutter from Google is a recent framework to enter the cross-platform arena, which was announced in February at Mobile World Congress 2018 to be entering a beta phase. Features of Flutter are fast development cycles, fast UI rendering and unique UI design, and native app performance on both platforms.


Introduction to Flutter

Dart programming language is used to write Flutter apps that are originally from Google and now an ECMA standard. Dart language is somewhat similar to languages like Kotlin and Swift and can be trans compiled into JavaScript code.


Getting Started

Flutter application development can be done on Windows, Linux, or macOS. While you can use any editor with the Flutter toolchain, there are IDE plugins for IntelliJ IDEA, Android Studio and Visual Studio Code that can ease the development cycle. We’ll use Android Studio for this tutorial.


Set up an editor

install the Flutter and Dart plugins

To install these:

  • Start Android Studio.
  • Open plugin preferences (File > Settings > Plugins on Windows & Linux, Preferences > Plugins on macOS,).
  • Select Browse repositories, select Flutter plugin and click Install.
  • Click Yes to install the Dart plugin.
  • Click Restart when prompted.

Create the app

  • Select the File > New Flutter Project.
  • Select project type – Flutter application, and press Next.
  • Make sure Flutter SDK Path text field specifies the location of the SDK. Install the SDK if it is not installed.
  • Enter a project name (for example, myapp), and press Next.
  • Click Finish.
  • Wait until Android Studio installs the SDK, and create the project.

1. main.dart

import 'package:flutter/material.dart';

void main() => runApp(new FlutterApp());


class FlutterApp extends StatelessWidget {
  @override
  Widget build(BuildContext context) {
	return new MaterialApp(
  	title: 'Flutter',
  	home: new Scaffold(
    	appBar: new AppBar(
      	title: new Text('Flutter'),
    	),
    	body: new Center(
      	child: new Text('Flutter'),
    	),
  	),
	);
  }
}

The main() function near the top uses the => operator for a single line function to run the app. You have a class for the app named GHFlutterApp.

You see here that your app itself is a StatelessWidget. almost every entities in a Flutter app are widgets, either stateless or stateful.  Override the widget build() method to create your app widget. You’re using the MaterialApp widget that provides a number of components needed for apps following Material Design.

For this getting started tutorial, remove the test file widget_test.dart in the test folder from the project by selecting it and hitting the Delete key.

If you’re on macOS, startup the iOS simulator. You can also use an Android emulator on macOS, Linux, or Windows.


2. Hot Reload

The best aspect of Flutter development is being able to hot reload your app as you make changes. This is like Android Studio’s Instant Run.


3. Widgets

Almost every element of your Flutter app is a widget. Widgets are immutable, since using immutable widgets helps keep the app UI lightweight.

There are two fundamental types of widgets you will use:

Stateless widgets are immutable, meaning that their properties can’t change—all values are final. [1]

Stateful widgets maintain state that might change during the lifetime of the widget. [1]

Stateless and stateful widgets are redrawn in Flutter apps on every frame, the difference being that the stateful widgets delegate their configuration to a State object.

To get started with making your own widgets create a new class at the bottom of main.dart:

class GHFlutter extends StatefulWidget {
  @override
  createState() => new GHFlutterState();
}

You have made a StatefulWidget subclass and you’re overriding the createState() method to create its state object. Now add a GHFlutterState class above GHFlutter:

class GHFlutterState extends State<GHFlutter> {
}

Add a build() override to GHFlutterState:

@override
Widget build(BuildContext context) {
   
}

Fill out build() as follows:

@override
Widget build(BuildContext context) {
  return new Scaffold (
	appBar: new AppBar(
  	title: new Text(Strings.appTitle),
	),
	body: new Text(Strings.appTitle),
  );
}

A Scaffold is a container for material design widgets. It acts as the root of a widget hierarchy. You’ve added an AppBar and a body to the scaffold, and each contains a Text widget.


Update GHFlutterApp class so that it uses your new GHFlutter widget as its home attribute, instead of building a scaffold of its own:

class GHFlutterApp extends StatelessWidget {
  @override
  Widget build(BuildContext context) {
	return new MaterialApp(
  	title: Strings.appTitle,
  	home: new GHFlutter(),
	);
  }
}

4. Making Network Calls

Earlier you imported your own strings.dart file into the project. You can similarly import other packages that are part of the Flutter framework and Dart.

For example, you’ll now use packages available in the framework to make an HTTP network call and also parse the resulting response JSON into Dart objects. Add two new imports at the top of main.dart:

import 'dart:convert';

import 'package:flutter/material.dart';
import 'package:http/http.dart' as http;

import 'strings.dart';

Dart apps are single-threaded, but Dart provides support for running code on other threads as well as running asynchronous code that does not block the UI thread using an async/await pattern.

You’re going to make an asynchronous network call to retrieve a list of GitHub team members. Add an empty list as a property at the top of GHFlutterState, and also add a property to hold a text style:

var _members = [];

final _biggerFont = const TextStyle(fontSize: 18.0);

The underscores at the beginning of the names make the members of the class private.

To make the asynchronous HTTP call, add a method _loadData() to GHFlutterState:

_loadData() async {
  String dataURL = "https://api.github.com/orgs/raywenderlich/members";
  http.Response response = await http.get(dataURL);
  setState(() {
	_members = JSON.decode(response.body);
  });
}

The underscores at the beginning of the names make the members of the class private.

To make the asynchronous HTTP call, add a method _loadData() to GHFlutterState:

_loadData() async {
  String dataURL = "https://api.github.com/orgs/raywenderlich/members";
  http.Response response = await http.get(dataURL);
  setState(() {
	_members = json.decode(response.body);
  });
}

You’ve added the async keyword onto _loadData() to tell Dart that it’s asynchronous, and also the await keyword on the http.get() call that is blocking. You’re using a dataUrl value that is set to the GitHub API endpoint that retrieves members for a GitHub organization.

When the HTTP call completes, you pass a callback to setState() that runs synchronously on the UI thread. In this case, you are decoding the JSON response and assigning it to the _members list.

Add an initState() override to GHFlutterState that calls _loadData() when the state is initialized:

@override
void initState() {
  super.initState();

  _loadData();
}

5. Using a ListView

Now that you have a Dart list of members, you need a way to display them in a list in the UI. Dart provides a ListView widget that will let you show the data in a list. ListView acts like a RecyclerView on Android and a UITableView on iOS, recycling views as the user scrolls through the list to achieve smooth scrolling performance.

Add a _buildRow() method to GHFlutterState:

Widget _buildRow(int i) {
  return new ListTile(
	title: new Text("${_members[i]["login"]}", style: _biggerFont)
  );
}

You are returning a ListTile widget that shows the “login” value parsed from the JSON for the ith member, and also using the text style you created before.

Update the build method to have it’s body be a ListView.builder:

body: new ListView.builder(
  padding: const EdgeInsets.all(16.0),
  itemCount: _members.length,
  itemBuilder: (BuildContext context, int position) {
	return _buildRow(position);
  }),

That’s just how easy it is to make a network call, parse the data, and show the results in a list!

6. Adding dividers

To add dividers into the list, you’re going to double the item count, and then return a Divider widget when the position in the list is odd:

body: new ListView.builder(
  itemCount: _members.length * 2,
  itemBuilder: (BuildContext context, int position) {
	if (position.isOdd) return new Divider();

	final index = position ~/ 2;

	return _buildRow(index);
  }),

Be sure not to miss the * 2 on itemCount. You’ve removed padding from the builder now that you have dividers. In itemBuilder, you’re either returning a Divider(), or instead calculating a new index by integer division and using _buildRow() to build a row item.

Read More
Harsh Gor Harsh Gor October 25, 2019 0 Comments

Collaborate Quickly With git

In the following article I am going to illustrate how you can share a git project with your team within your local area network.

Note: I am using Ubuntu OS throughout this article.

First thing first :

you have to decide your workflow first, it can be in 2 ways:

1 dedicate a machine
2 share from your personal computer

Anyway whatever you decide this can be achieve by using ssh authentication or using git demon.

In this section we are focusing on sharing using ssh key authentication…….

Lets understand this by following scenario:

lets assume Bob,Alice and Mike is a part of a small team and working on modules of same project.

now its necessary to make sure they can work on same code without interrupting someone else’s workflow

so, they decided to use git for version control:

What is Git ?

Git is a free and open source distributed version control system designed to handle everything from small to very large projects with speed and efficiency.

Now instead of going with available services like github or bitbucket they have decided to use git locally over LAN

now they have chosen a regular computer with regular office machine i am going to call this a git server in further story…….

Now Bob, Alice and Mike generate ssh keys by hitting the command into terminal `` this will generate new key value pair for your computer, backup your keys if already exists or it will be overrides……

science our employees doing it first time they will get the following results:

hp@hp-HP-15-Notebook-PC ~ $ ssh-keygen
Generating public/private rsa key pair.
Enter file in which to save the key (/home/hp/.ssh/id_rsa): /home/hp/.ssh2/id_rsa
Enter passphrase (empty for no passphrase): 
Enter same passphrase again: 
Your identification has been saved in /home/hp/.ssh2/id_rsa.
Your public key has been saved in /home/hp/.ssh2/id_rsa.pub.
The key fingerprint is:
SHA256:Wajzk72KRL/rwNGvGx2JL+sgmtsTxQlh+cmU8N94230 hp@hp-HP-15-Notebook-PC
The key's randomart image is:
+---[RSA 2048]----+
|    ++ .         |
|   .o.o  .       |
|     *.o. .      |
|      B+ * .     |
|     .= S =      |
|    .o = B + .   |
|    ..= B * . . E|
|   +.o + B .   . |
|  +....oX+.      |
+----[SHA256]-----+

i have changed the save path ,one can keep this default. to keep default press the enter key

/home/bob/.ssh2
├── id_rsa
└── id_rsa.pub

Next step :

copy id_rsa.pub file for each employee to git server

Tip:
copy directly from your computer to any other computer using scp
by hitting following command :

scp filename user@ipaddress:/path/to/copy

for example the command for copy id_rsa.pub from employees computer to git server as follows:

Bob:
[copying and renaming file to desktop to avoid further confusion]
cp ~/.ssh/id_rsa.pub /home/hp/Desktop/bob_id_rsa.pub
scp /home/bob/Desktop/bob_id_rsa.pub gitserver@192.168.1.110:/home/gitserver/Desktop/
[using scp command copying bob_id_rsa.pub to git servers desktop directory]

Alice and Mike follows the same!

NOTE:
first time it might ask for add remote host to known_hosts, type yes and press enter
then it will ask password for remote computer in our case password for gitserver

now from  perform  and for rest of people.

reason of adding public keys of all users to  to avoid entering password each time while doing ssh to remote server and further git processes like cloning the repository.


That’s it!!

now our employees can able to clone project repository from our local git server machine………..

Now from gitserver computer :

create a directory at any location of choice : let's say within desktop
mkdir mywebsite
cd mywebsite


now within our  directory run a command  it will : Create an empty Git repository or reinitialise an existing one

now either you can perform this command within existing project or within our newly created directory.

after initialising mywebsite as git create any file likethen stage the changes by performing  it will add your changes to staging area, after that perform when -m stands for commit message.

now if you hit it will show all branches available. results wil be simmilar to  which is our default branch:

you can modify your terminal to display current working branch just past the following code end of ~/.bashrc file [ubuntu : may need to edit with sudo for take changes to effect, then perform source ~/.bashrc to save modifications]

parse_git_branch() {
     git branch 2> /dev/null | sed -e '/^[^*]/d' -e 's/* \(.*\)/ (\1)/'
}
export PS1="\u@\h \[\033[32m\]\w\[\033[33m\]\$(parse_git_branch)\[\033[00m\] $ "


now we are done at server side for now…….

now our employees can clone this repository by hitting git clone

command will look like following in our case git clone  for example Alice can clone our project mywebsite by running following command within her terminal 

now Alice can found a directory named mywebsite within the location she has performed git clone, now she can perform all her tasks by creating a separate branch for her module of work.


Now remember the option you have decided!

If we have dedicated server for git then you should initialise git with git 

but if work need to be done on gitserver as well then one may also face fetal error while checking out master branch because its already checked on git server.


Tip:

if you are also need to work on server you should make temporary branch and keep it checked out on server to avoid master already checked out error.


Read More
Avatar Smit Modh September 9, 2019 0 Comments

How Graphic Design Helps Your Website

Graphic design has a big role to play in the modern capitalist business environment. Businesses need the services of graphic designers to create spectacular marketing materials. These materials include brochures, business cards, websites, leaflets and so on.

Let’s take a look at the different ways graphic design can help your company (and take your brand to an entirely new level in the process):


1. Graphic design breaks through the welter on social media

Social media is one of the best ways to connect with your attendant—but only if you can break through the clutter of noise and contention and grab their attention. And a great way to do that? Finished graphic design.

Images are key to join with your audience. 90% of the data transmitted to the brain is visual—and 40% of people reply better to visual information that plain text. Including well-designed graphics in your social media posts will help them jump off your audience’s screen, grab their attention, and start a interject. don’t trusted? just look the survey,

1. Facebook posts with images get 2.3x more engagement than Facebook posts without
2. Twitter updates with images can generate 150% more retweets than text-only tweets
3. Adding relevant images to blog content can increase Pinterest traffic by 62.5%

If you want to break through the welter on social media, look for opportunities to inclusion graphic design into your strategy.


2. Graphic design makes data corporeal

Leverage graphic design allows you to present key data, information, and analytic about your business in a way that’s going to pack a powerful punch and make a real impact on your audience.

When it comes to recast your data into visually impactful assets, the sky’s the limit. Getting ready to present at your company’s end-of-year meeting? Pull all of your key messaging together in a well-designed annual report. Not sure what to do with the results from a recent customer answering? Pull the statistics into an infographic, share it on social media, and use it as a way to generate leads (infographics have been shown to increase web traffic by 12%). Start a new product? Instead of writing out your explanation, put together a visual how-to guide to get people up to speed on how to use your product.

If you have information you know will make a big impact on your audience, the best thing you can do is present it in a way that’s going to pack the most impactful punch.


3. Graphic design helps make your brand

When it comes to designing key branding key, you want to be unique, but you don’t have to reinvent the wheel to do this.

Think of your branding as your corporate DNA. It’s who you are as a company. It tells your clients and customers, what you’re about, what they can expect, and why they should work with you. Your branding says a lot about you, and a lot of that communication is visual.

Once you’ve honed in on your brand’s personality, it’s time to bring it life visually. There are a number of visual elements you can design to strengthen your branding, connect with your audience, and drive engagement, including:


Logo: Your logo is, hands down, the most importance thing you’ll design for your company. It acts as the face of your brand, and will be the element people most closely associate with you and your company.


Website: Think of your website as your brand’s real estate on the web; it’s where people will go to discover who you are and what you have to offer. In order for it to serve its purpose, it needs to be on-brand and well-designed.


Brand color palette: Color is an extremely powerful thing, and the colors you choose for your product color palette will send a very particular message to your audience. Before you settle on colors, do a little analysis on color psychology. A blue and green color palette is going to send a very antithesis message from a palette made up of shades of red, orange, and yellow, so make sure the colors you choose inspire the right emotions in your viewers.


Fonts/typography: The same thing goes for typography. Using Comic Sans as your font is going to send a very dissimilar message than using Arial or Helvetica. Make sure the fonts you choose—and the way you use them—are in line with your brand.

Conclusion

Graphic design is special to businesses and other walks of life in varied ways. Professionally make logo designs help make a good impression on the potential clients. Many of them become faithful customers later. But, a first impression that a graphic design makes on viewers is of crucial importance in drawing their attention towards a company.

Read More
Avatar Pooja Dave August 13, 2019 0 Comments

How Digital Marketing Helps for Small Business.

Evolution of Information Technology more product services and sells through use of technology. Where small business has limited amount of marketing budget, that time Digital Marketing helps to grow business.

The following reasons will show you how digital marketing is not cost but it wise and cost effective marketing investment decision.

Cost effective:
Traditional marketing is very difficult for small business with limited budget. Like newspaper ads, TV ads need to spend large amounts while digital marketing can do the same on small amount.

Let’s Consider, small business need to spared products or services message to 1000 people. We can do it small amount using social media. for same its more costly by physical mail or television ads.


Generate better revenues:
Higher conversion and more lead of business online generated that delivered better and higher revenues.


Targeted audiences :
Digital Marketing allows you to set targeted audiences. On social media or blog your can start conversion with your client / customer. We can also run digital ads for targeted customer base on age, gender, interests, professional, geolocation etc.


Helps to Mobile Consumer:
Generation of smartphone Survey (ClickHere) In 2018, in data show 71% of site visits were from mobile devices. And 29% come from desktop. Its means we can’t ignore this data. Here mobile can helps to grow business?.


Marketing budgets:
Digital marketing is more cost-effective than traditional marketing. it can also possible on small marketing budget. As we see newspaper ads and television ads need large amount of marketing budget where digital marketing can so same result with minimum budget.


Present your Product/Service online:
Traditional shop need present but at digital space also need to present online. On Digital Marketing we present our product online space. its also specification and detail available on search.

If you have a small business you have make strategy of digital marketing and need to continues check iteration of customer.

Arkay Apps is digital marketing agency  having experiences on design digital marketing strategies for small business. We provides digital marketing services to our worldwide clients like Australia, Uganda, London and India. You can contact us for same.

Read More
Arkay Apps Arkay Apps July 27, 2019 0 Comments